Pairing Click-to-Messenger Ads With Messenger Chatbots
Did you know you can use Facebook ads to engage your clients' Messenger chatbots?

As digital marketers, we often talk about Facebook marketing - and particularly Messenger, for hosting our chatbots. Why is this? Chat marketing is much more than just a conversational bot. It’s being able to leverage that bot to work hand-in-hand with other marketing materials to produce the best, most seamless results for your clients - and their businesses.
What are click-to-Messenger ads?
As you most likely know, click-to-Messenger ads operate similarly to other Facebook ads. They can be set or placed anywhere other ads can; such as in the Newsfeed, Stories, columns and even on Instagram. It’s just how it sounds!
Put simply, click-to-Messenger ads are Facebook ads that have a built-in CTA which takes users into a direct Messenger conversation with the business profile! For clients, this is where having a Messenger chatbot installed can supercharge results.
As soon as a user interacts with the initial greeting message from the client's ad, they will be added to their Messenger list.
If you've installed a chatbot for a client, or are running click-to-Messenger ads already, keep reading!
Creating click-to-Messenger Facebook ads for clients
You may have already created a click-to-Messenger ad for a client - in which case, skip to the next section on how to connect it to their chatbot! If you’re still to create a click-to-Messenger ad, keep reading:
Step One:
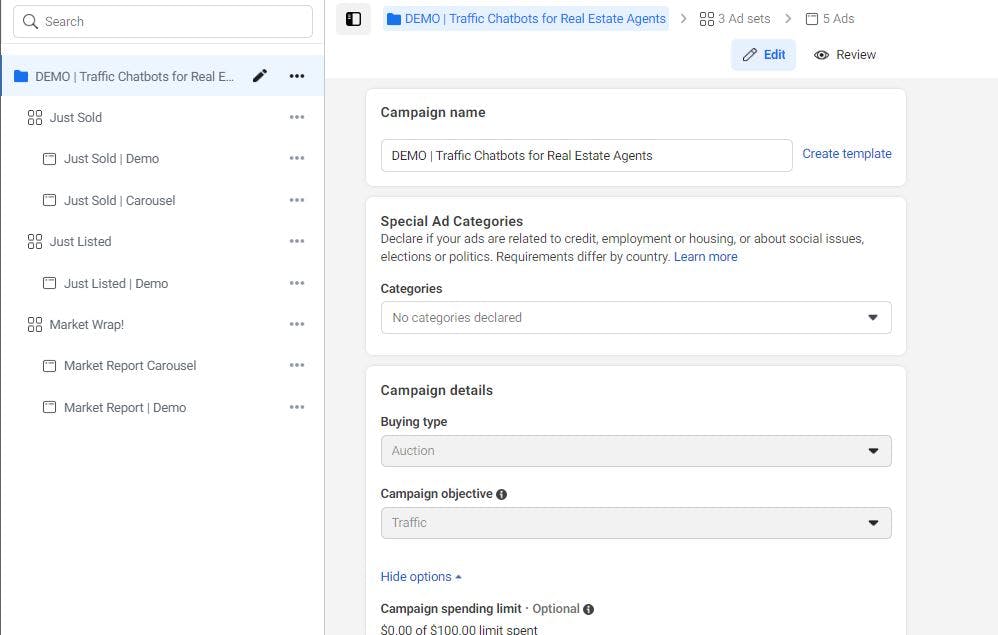
Head to your client's Facebook Ads Manager and create a new ad - either singular or an Ad Set.
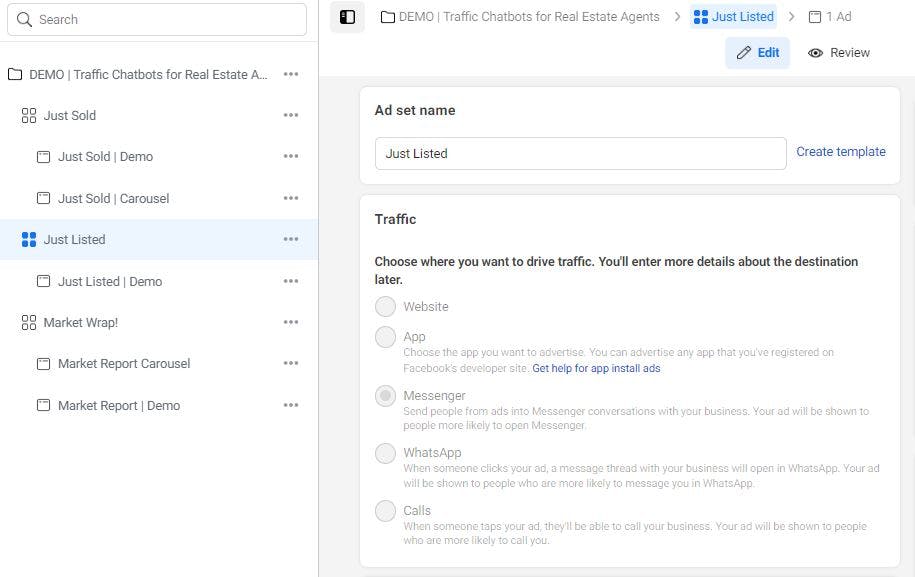
For an Ad Set: Select Messenger under Traffic and create a name for the Ad Set.
For a singular ad: Select Messenger under Message Destination, and select Click to Messenger from the drop down panel.
Step Two:
For an Ad Set: Choose an option from the Campaign Objective panel - if you are unsure, Traffic is always being a safe option!
For a singular ad: Choose your target audience for the ad, according to the client's and businesses goals.
Step Three:
For an Ad Set: Create your first ad as part of the set, following the above instructions. Then select the ad from the Ad Set, and continue.
If creating a singular ad: Move on to Step Four.
Step Four:
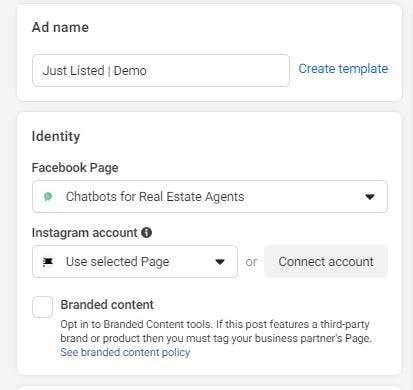
Under Identity, ensure that the client's ad will come from the same Facebook page that their bot is linked to!
You can now set their budget, and desired schedule for the ad to run.
Step Five:
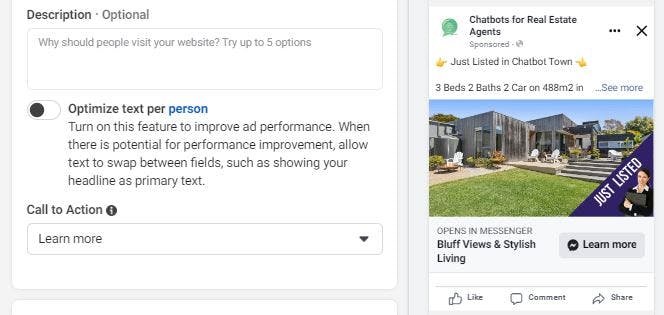
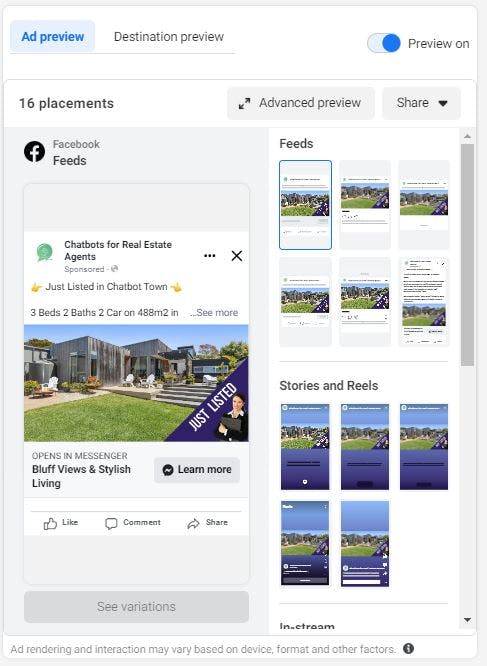
Upload the Ad Creative, including images, videos, text and a headline.
You will notice you are able to choose from a dropdown menu of CTA’s to display on your ad - this is what will bring the user to Messenger when clicked! Learn More tends to be the most popular as it sparks curiosity in the users.
You can also choose the target ad audience according to the client's goals for this specific click-to-Messenger ad.
Step Six:
Next comes placing the ad. You can leave the ad set to Automatic Placements. However, if you’d like your click-to-Messenger ad to be shown on Instagram too, then you can use Manual Placements.
The positives of this could be gaining new audiences and users your client may not reach through Facebook alone. Be wary though, as it can be jarring for some users to be taken to Messenger from scrolling on Instagram! Make sure to check with your client and let them know the pros and cons of each placement option.
Step Seven:
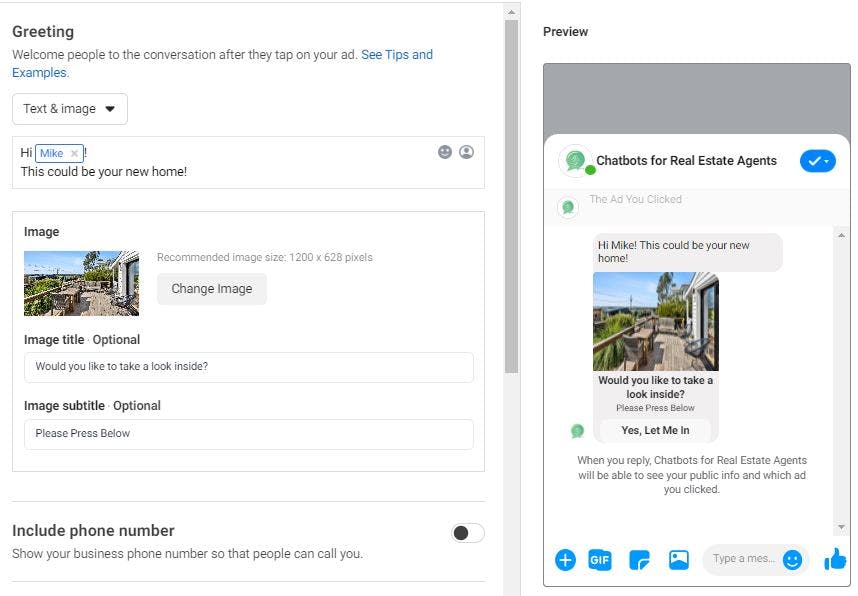
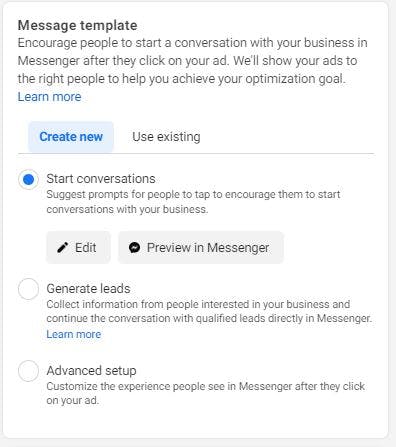
Under Message Template, select Create New and then Start Conversations then Create. Here, you can customise the greeting message, as well as an image to go along with it.
Under Customer Actions, select Buttons. Scroll to Bot Payload. This is where we will be entering a keyword trigger for the client's click-to-Messenger ad. This trigger will be the same trigger word used as for the payload (or chat flow) on the AdsThatChat platform that you wish the ad to engage with once a user interacts.
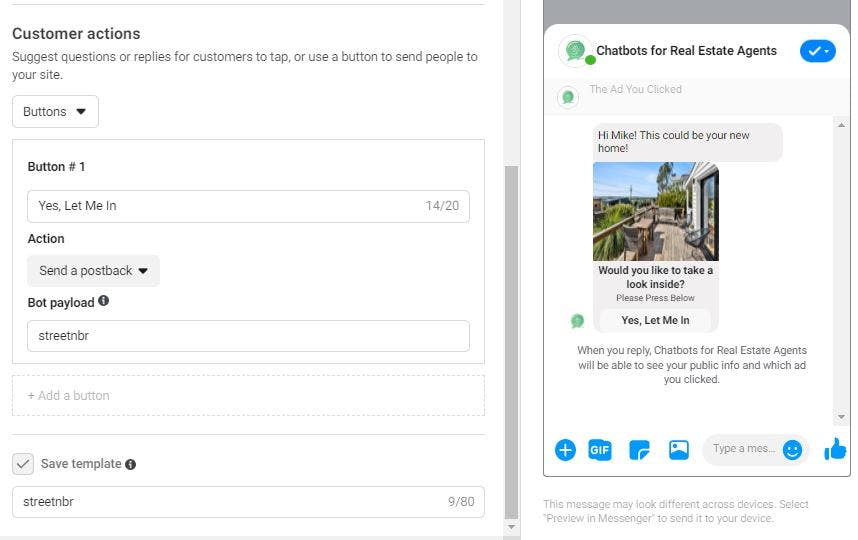
In our example, we have used 'streetnbr' as our Bot Payload, and as our Trigger Word on the AdsThatChat platform for this specific chatbot flow.
Now let’s jump over to the platform, and get your client's chatbot ready to connect with their ad!
Setting up your client's Messenger chatbot for click-to-Messenger ads on Facebook
We’ve got the ad set up and ready to publish now - but we just need to select a Bot Payload for the ad to run off!
Let’s get to finishing the set up for our click-to-Messenger ads, over on the platform.
Step One:
Head on over to the AdsThatChat platform, login, and head to Messenger Chatbots.
Step Two:
Select the Messenger chatbot that is attached to the Facebook page the client's ad will be running off (refer to step four above).
Step Three:
You may have already created a trigger for the purpose of responding to the ad, which is great! If not, select Add a new trigger and start creating a flow for the chatbot, once it receives users that have been directed from the click-to-Messenger ad.
Make sure you create the text for each button you’ve chosen in Ads Manager! Choose which bot responses each one will link to and build out a flow.
Step Four:
With the elected new trigger and chatbot flow open on the platform; make sure in the Trigger Word(s) box, you type the trigger word exactly as it appears in the Bot Payload section in Ads Manager.
Copy and paste this into the Tag Users box below, also.
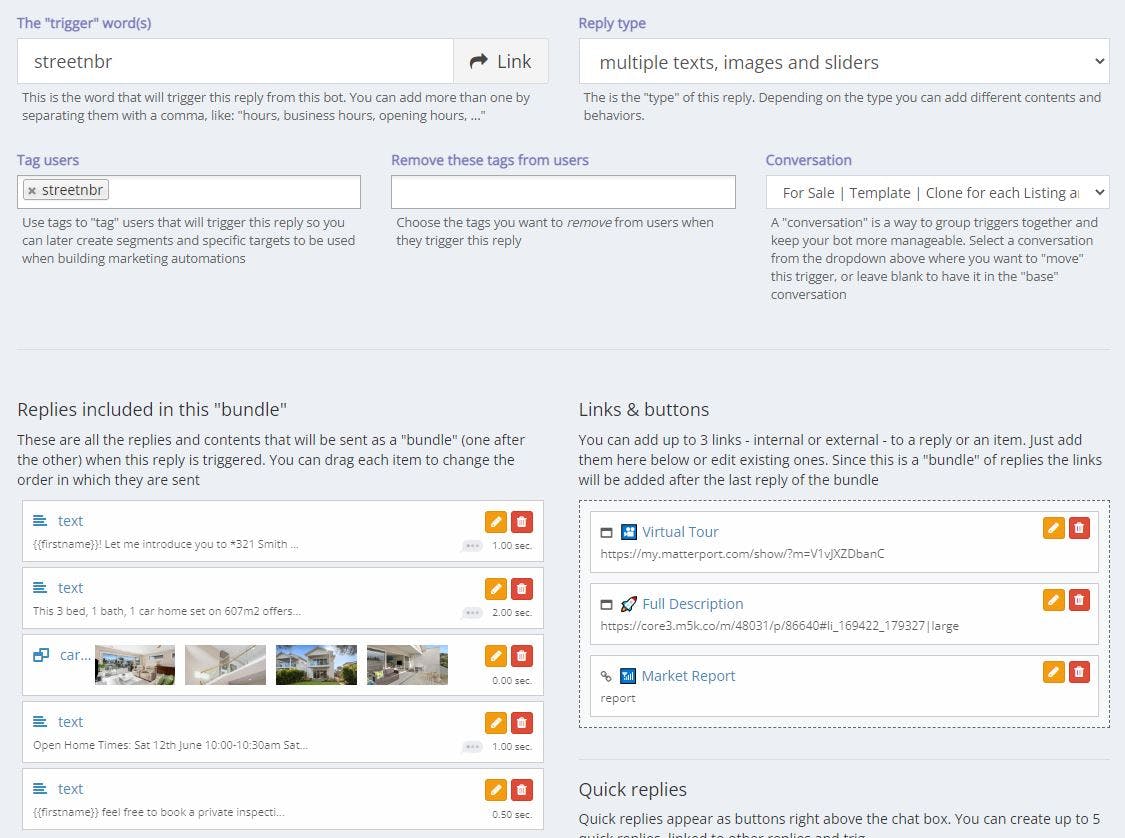
You can see we have used 'streetnbr', same as the Bot Payload. Make sure this is exactly the same! Copying and pasting is a good idea.
Step Five:
Head back to Facebook Ads Manager where we have finished setting up our client's click-to-Messenger ad, and hit Finish.
You may preview your ad or send it to a client, and then click Confirm to submit your ad to Facebook for review.
Woohoo! That’s it! As soon as Facebook approves your ad, users who engage will be lead to the Messenger chatbot experience you’ve set up.
Handy things to keep in mind when creating click-to-Messenger ads
There are a few simple things to consider when planning a click-to-Messenger ad, in order to have it run as smoothly and successfully as possible.
Be specific with audience targeting
None of us want to be wasting money on advertising spend, so in order to maximise ROI, ensure you are targeting your ads thoughtfully to the right users. While all ads will obviously be created with your target audience in mind; some ads will perform better with certain sub-audiences than others.
Mention the word 'Messenger' somewhere in the ad creative
As we mentioned before, it can be easy to leave a sour taste in a user’s mouth. By mentioning the word Messenger or Message somewhere in the ad copy, you will be preparing users for the interaction rather than springing it upon them.
Emojis draw attention and help CTAs to be hit
Try a pointing hand, a message bubble or an arrow. Emojis are not only eye catching but user-friendly, relatable, and fit into the digital landscape of Facebook. We want to be a natural presence!
Carefully choose greeting messages
We aim for users to at least respond to your Messenger chatbot’s greeting message. Why? So we can add them to our Messenger list!
Buttons increase your odds of getting an interaction back, which is why we recommend using buttons instead of quick replies. The great thing about buttons is they don’t disappear as the conversation progresses!
Go out there and get your clients some great results!
It takes just two clicks to have a new lead for your client and their business. Ads that refer users to a client's Messenger inbox are a no-brainer for any digital marketer on Facebook.
Having a Messenger chatbot to handle and streamline the process? That’s invaluable.
Get in touch today to see how Messenger chatbots can start to revolutionise things for your clients!